Part 1: Adding a New Case Type
Log in using a user account with Admin privileges.
Click on the Settings icon (⚙️) from the top menu.
Navigate to Case Type.
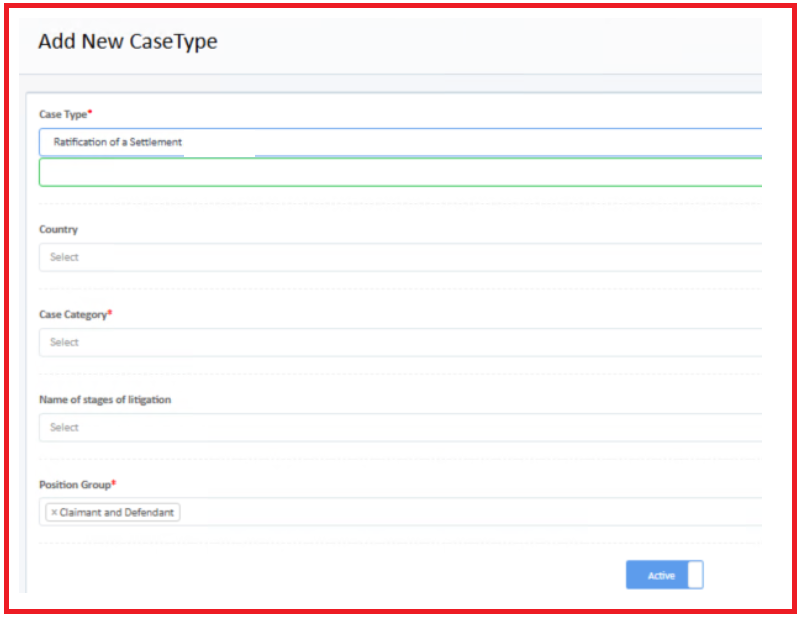
Click the “+” (Add) button at the top of the page.
Select the required:
Case Category
Position Group

Save the new case type.
Part 2: Configuring Case Type Mapping
After creating the case type, you must configure its mapping.
Go to Settings (⚙️).
Navigate to Case Type Mapping.
Click the “+” (Add) button.
Select:
The Case Type
The Location

Select the required checkboxes for:
Category
Judicature
Stages (as applicable for the case type)
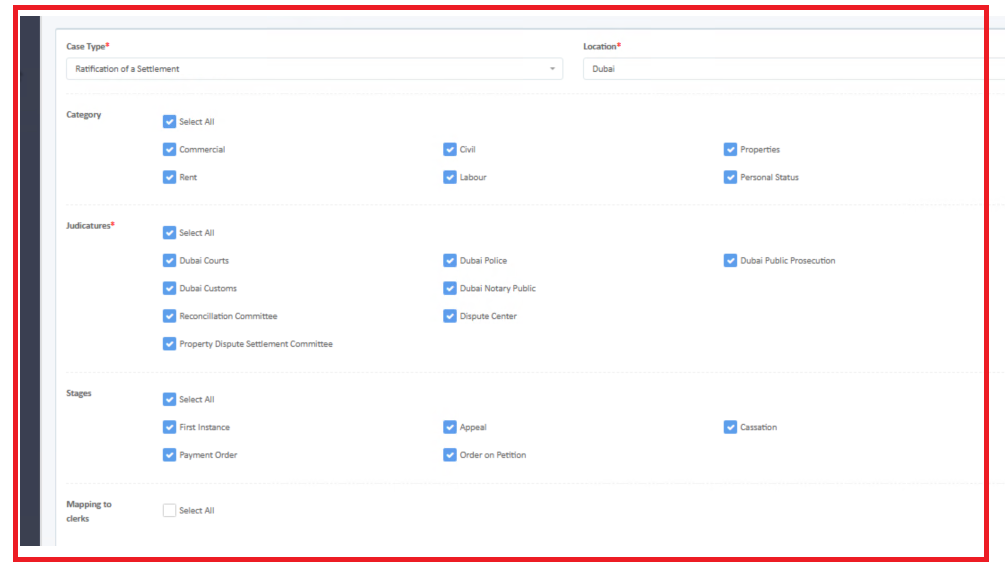
Select the required:
Position Group
Hearing Type
Single Hearing
Multiple Hearings

Click Submit to save the mapping.
Important Note
If the case type needs to be available in multiple locations, a separate Case Type Mapping must be created for each additional location following the same steps above.
Was this article helpful?
That’s Great!
Thank you for your feedback
Sorry! We couldn't be helpful
Thank you for your feedback
Feedback sent
We appreciate your effort and will try to fix the article