Client Reporting turns the events you already log on a case — hearings, meetings, decisions — into ready-to-send client updates. Enable it once, and every tracked update queues itself. You review and email it whenever you're ready.
1. How it works
The whole feature is one loop: enable → auto-queue → review → send.
- Enable event types — a one-time, firm-wide setup choosing which kinds of updates should be tracked.
- Work the case — every reportable event you save auto-queues as an unreported update for that case's client.
- Review & send — open Client Reporting, pick a client's pending updates, and send them by email.
- Or send on the spot — right after saving an event, a Send Report shortcut opens the same flow pre-filled.
2. Enabling modules in the Client Reporting tab
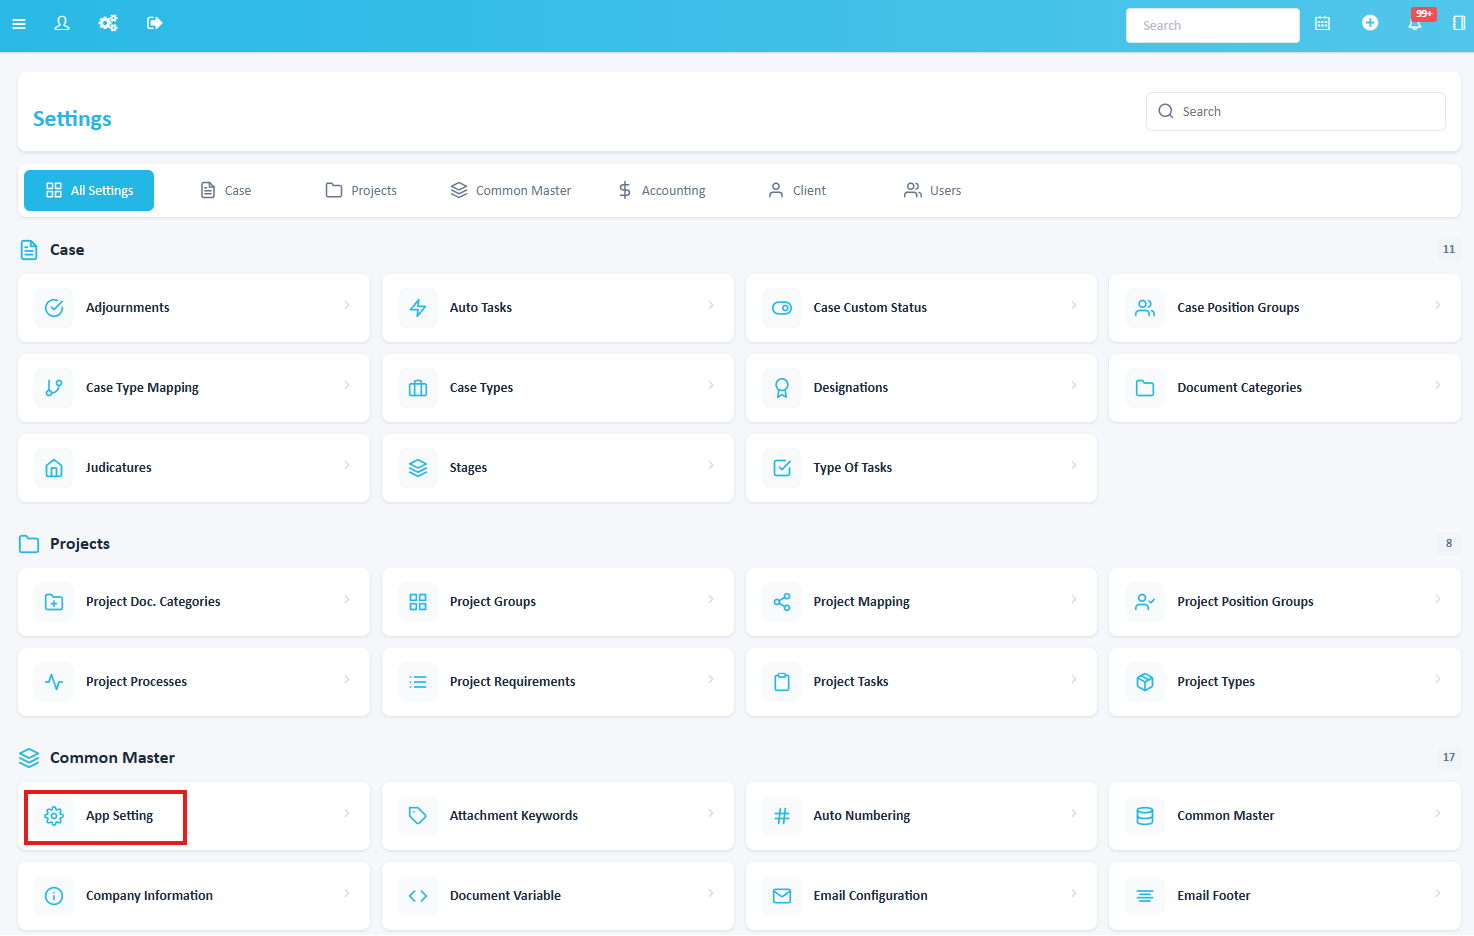
Go to Settings → App Settings → {Client} Reporting.
These settings apply to the whole firm — not a single case or a single client. The tab is organized into four parts.
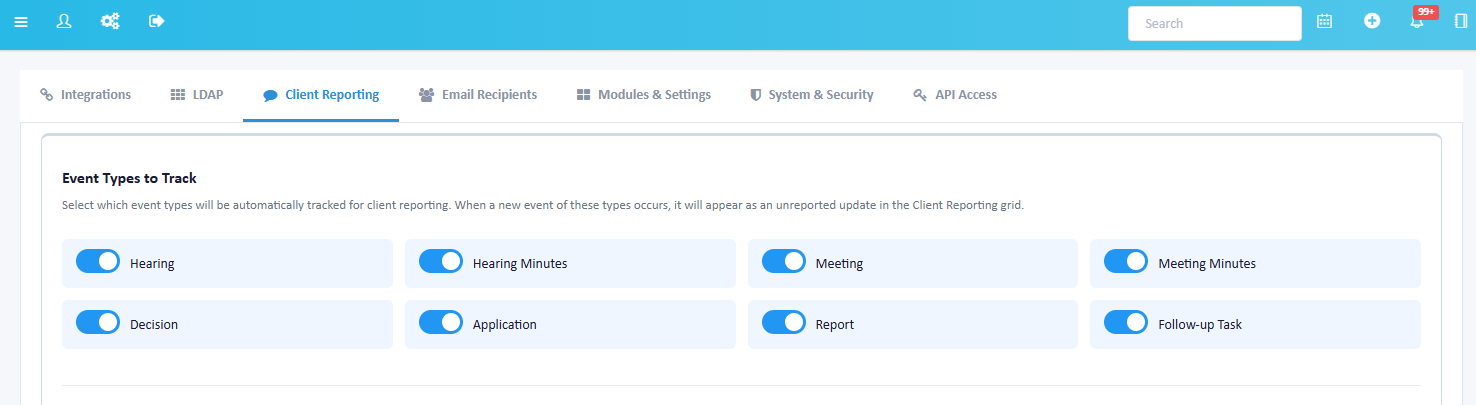
Event Types to Track
Switch on the kinds of updates that should flow into reporting. Only the types you turn on are auto-queued:
- Hearing (covers both hearings and hearing minutes)
- Meeting (covers both meetings and meeting minutes)
- Decision
- Application
- Report
Hearing and Meeting each work as a single switch covering their minutes too.
Good to know: Turning a type off only stops new events of that type from being tracked. Updates already queued are not deleted — they stay ready to send or clear.
The other three sections
- Email Configuration — default CC recipients, a default email footer, and which address updates are sent from (System / the active user / a custom address).
- Email Subject Templates — per-module subject lines with dynamic tags such as
<case_no>. - AI Draft Settings — default language, tone, salutation, and signature block used when you ask the AI to draft the update text.
Click Save to apply your changes.
3. How case updates get added automatically
Once a type is enabled, queuing is fully automatic.
When you save a reportable event on a case or matter — a hearing, meeting, decision, application, or report — the system checks whether that type is enabled. If it is, the event is queued as an unreported update for that case's client.
Queued updates are what you'll see reflected in Client Reporting as:
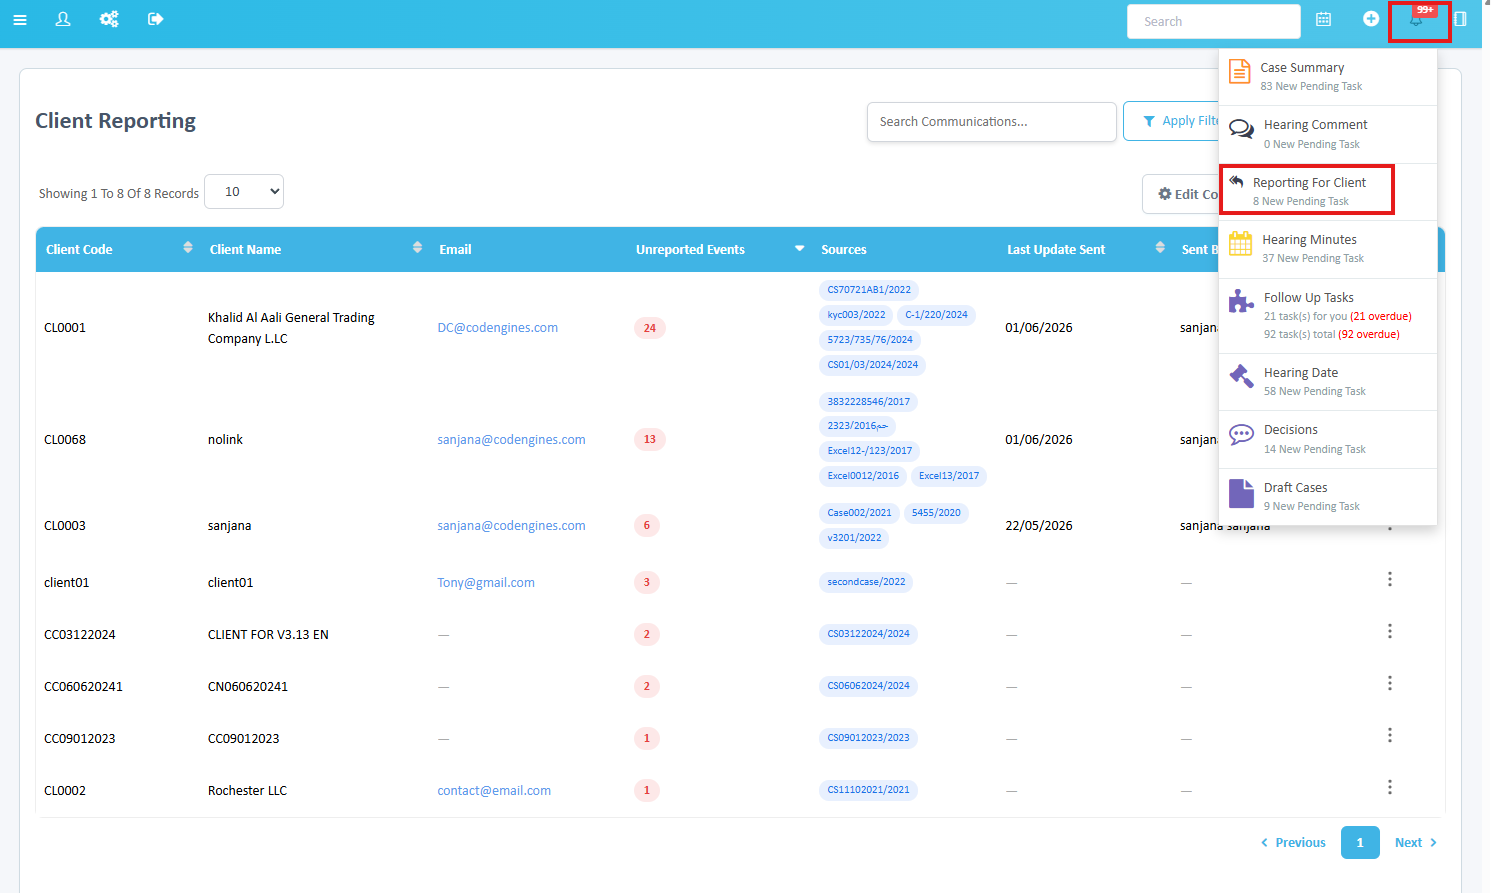
- The Unreported Events count (a red badge) on the client's row.
- Ready-to-send items inside the send overlay, grouped by matter and case.
In practice: Log the event in the case as you normally would. That's the whole action — nothing else is needed to get it into reporting.
4. Opening Client Reporting & sending an update
Open Clients → {Client} Communication.
You'll land on a list with one row per client. Two sub-tabs sit at the top:
- Unreported — clients who have pending updates (the default view).
- All — every client.
What each row shows
- Unreported Events — a red count of pending updates (sorted highest-first by default).
- Sources — colored chips showing where the updates came from: case, project, obligation, document, or to-do.
- Last Update Sent / Sent By — when the client was last updated, and by whom.
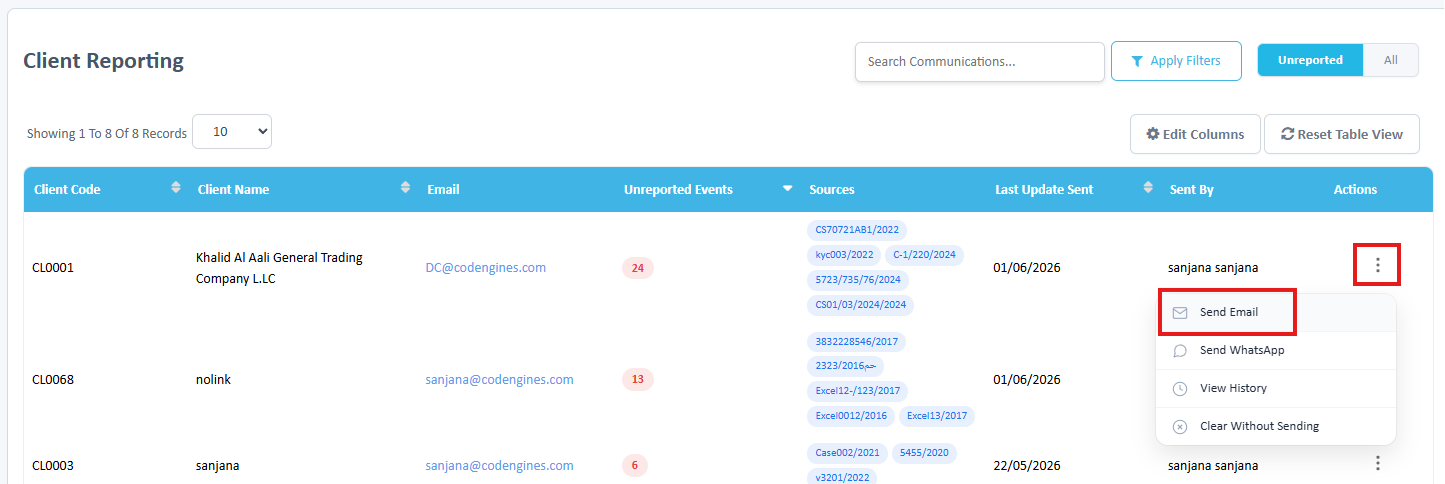
Row actions (the ⋮ menu)
- Send Email
- Send WhatsApp — only if WhatsApp is enabled for your firm.
- View History — everything sent to or cleared for this client.
- Clear Without Sending — only appears when there are unreported updates.
Inside the Send {Client} Update overlay
Choosing Send Email opens the compose overlay, where you can:
- Set recipients — To, CC to Client, and CC to Self (with quick-fill chips for role groups).
- Edit the auto-filled subject (with a reset-to-default button).
- Check which queued events to include, along with their attachments.
- AI-draft the body, then refine it in the rich-text editor.
- Pick a footer — System Default or a per-client default.
- Toggle the whole email between EN / AR, and use the Preview tab to see exactly what the client will receive.
Click Send Email to send. On a successful send, those events are marked Reported and drop out of the unreported count for everyone on the team.
Already spoke to them? Clear All Without Sending marks the selected events as reported without emailing — for when you've already updated the client by phone. It's logged in history as a "Cleared" entry.
5. The "Send Report" shortcut
Email a client the moment you finish logging an event — without leaving the case.
When you save a reportable event in a case and that type is tracked, the confirmation message includes a Send Report button instead of a plain "saved" notice.
- Save the event — log your hearing, meeting, decision, etc. as usual.
- Click Send Report — on the success message that appears after saving.
- Overlay opens pre-filled — the Send {Client} Update overlay opens for that client with the event you just saved already checked.
- Review & send — adjust the email as needed, then Send Email (same flow as Section 4).
Was this article helpful?
That’s Great!
Thank you for your feedback
Sorry! We couldn't be helpful
Thank you for your feedback
Feedback sent
We appreciate your effort and will try to fix the article